Saturday, November 11, 2017

Minnesota

My work needed me to come to Minnesota to test a software system and of course they are experiencing extreme low temperatures for November.  I would bet that if we were not here it would be normal temperatures for this time of the year.

We woke up Thursday morning to 9 degrees Fahrenheit and no hot water.  After it warmed up to around 28 degrees I got the hot water line thawed out and we were back in business.
A beautiful sunrise in Minnesota.
The next morning it was closer to 5 degrees and we had no water at all.  Even after trying to thaw out the lines with an electric heater and hair dryer, it just did not happen.  The temperature only reaching around 15 degrees Fahrenheit did not help matters either.

On the bright side, at least there was not a lot of snow to deal with too.
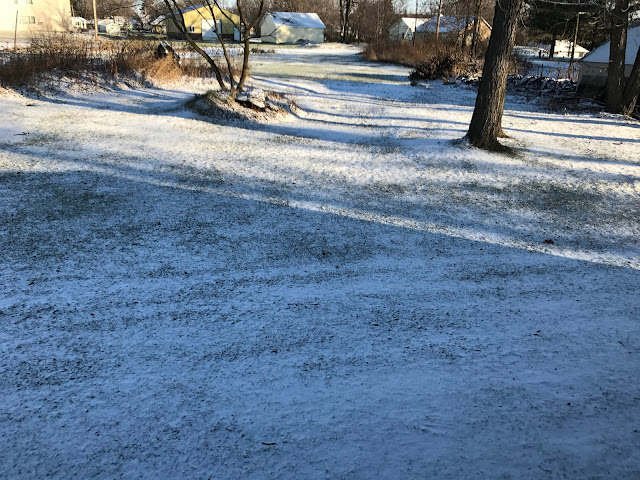
Cold morning around 9 degrees Fahrenheit.
I went to the grocery store and bought ten, one gallon, jugs of water, so that we would have water to drink and be able to flush the commode when we used the bathroom.

I tried turning up the heat to help heat up my storage bays and hopefully the frozen lines, but it did not work and I only ended using up most of my on-board propane, which leads to another problem.

The on-board tank is inside a bay, so does not get as cold as my external 30 lb tank does, which will freeze in temperatures lower than 30 degrees and makes it useless.  

To pack up the RV to go get the on-board tank filled is too much trouble and if it is below freezing, is hard on my slide covers which like to freeze and crack when we pull in the slides.

So my next thought was to buy a propane tank blanket, but no one sold any locally and the ones on-line were $400.00 plus dollars. 

The only option was to make one myself with some left over water line heat wrap and foil bubble wrap insulation.  After researching it, I did not see where it would cause the tank to explode or anything, so decided to give it a try.

Myself and a couple of the kids drove to a Ace Hardware and bought the foil bubble wrap insulation since that was the only thing I did not have on hand.  I used real, silver, duct tape which I always keep on hand, because it is the best for this and many other types of applications.
Supplies for wrapping my LP tank with heat tape and insulation.
After gathering all of my supplies together I got started on the application of the heat tape.  I only had a 6 foot long heat tape, so hope that is enough to heat the tank up when it gets below freezing.  If not I will buy a 12 foot role and replace it.  I also made sure the thermostat was tape securely to the tank.  
Wrapping the heat tape around the LP tank and taping it.
After taping the heat tape on securely, I cut the foil bubble wrap insulation and started to tape it onto the tank as tight as I could.  I also did not cover the thermostat with the foil insulation since I want it to feel the outside air temperature so cut a hole into the insulation and only covered it with duct tape.
Fitting the foil bubble wrap insulation to the LP tank.
I then folded the insulation and worked it around the top of the LP tank, taping it as needed.  I'm not too worried about it being water tight since the tank sits under my kitchen slide and does not get all that wet when it rains.
Working the insulation around the top of the LP tank.
After taping the insulation around the top to include the inside of the handle, I took a piece and set the tank on it and pulled it halfway up the tank and taped it completely around so all of the tank is insulated, except for the valve.  That may be a mistake, but time will tell.

I should have taped the bottom piece on first and then wrapped the top insulation over it, but the duct tape will seal it fine and I did not think of doing it like that until after I already had the top taped.  If I need to add a longer heat tape, then I will redo it that way.
Completed wrapped LP tank with heat tape.
So time will tell whether or not this will be sufficient enough heat to keep my propane from freezing when the temperatures get below 32 degrees.  The real test will be when it gets in the single digits and it does not freeze.

I may also have to do something with the valve in extreme cold weather, but time will tell.

This was my weekend project and I hope I did not waste my time, but I did have fun and got a feeling of accomplishment.
My competed insulated LP tank with heat tape.
God bless and stay warm!

Thanks!
Don, Misty, and Kids.......
Thirty states visited so far.

Sunday, October 29, 2017

Wisconsin

One of the main reasons we headed to Wisconsin was to stay at the Moxon's farm near Camp Douglas, WI and help with some work.  Unfortunately the cellular signal is very bad and I could not connect to do my computer work, so we ended up staying at Fort McCoy.

We did get to meet a very good family though and can add them to our good friends list, which is the best thing out of the whole deal.
Camped at the Moxon Farm at Camp Douglas, WI.
They had a really nice place and a beautiful home.  We made sure we visited them a few times while staying in Wisconsin.

Fort McCoy's Pine View Campground was nice too.  It is one of the better military RV parks that we have stayed at to date.  Everyone who worked there was very friendly and accommodating.

They had plenty of playgrounds, boating, swimming in the lake, and pedal cars, which the kids had fun on.
Avery and Courtney riding a pedal car at Fort McCoy, WI.
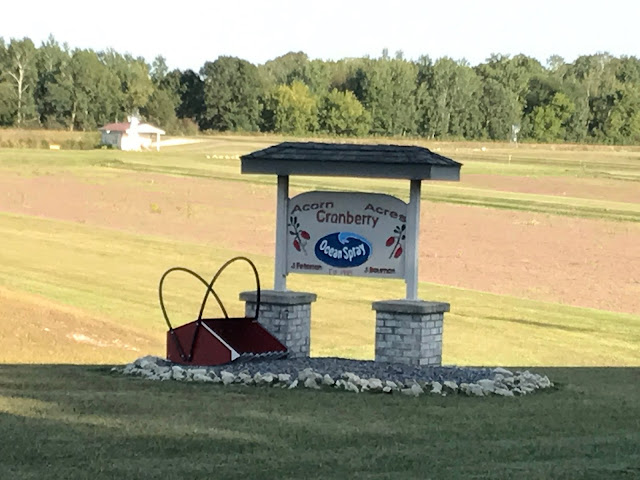
While in Wisconsin we got to see a bunch of cranberry farms to include ones for Ocean Spray.  It is neat when you see where a national product comes from.
One of the many cranberry farms that we saw while in Wisconsin.
We also drove to Devil's Lake State Park located near Baraboo, WI which is part of the 1000 mile Ice Age Scenic Trail and the third oldest state park in Wisconsin which was founded 1911.  It is also the largest with a 360 acre lake and the most visited in the state.

It has multiple natural attractions along its quartz bluffs which border the lake to include the Devil's Doorway rock formation.


Devil's Doorway rock formation at Devil's Lake State Park.
It was quite a climb to get up to the bluffs, but well worth it for the views.  We parked at the Civilian Conservation Corps trail head, walked it westward to the Potholes Trail, which connects to the East Bluffs Trail, and then westward still to the Devil's Doorway Trail.
Climbing the Potholes trail up to the top at Devil's Lake.

A stairway in the cliff up to the bluffs at Devil's Lake.

The kids at the top of the stairway, but only about half way up the Potholes Trail.

Misty bringing up the rear taking pictures and making sure we keep everyone with us.
Once we made it to the top, the view was spectacular.  It is well worth the climb, but next time we will get there earlier in the day so we have more time to explore and also take some water and some food.
Courtney, Chloe, Ethan, Avery, Tia, and Ian on the Eastern Bluff at Devil's Lake.

A beautiful view of Devil's Lake from the Eastern Bluff.
A shot of the Eastern Bluffs from across the lake that we climbed at Devil's Lake.
There were many places on the trails that were super tight.  The climb down was as hard or harder than the climb up or at least it felt that way on the knees.
Daddy and Cami squeezing through one of the many tight spots on the trails at Devil's Lake.
Misty looking pretty on the trail.
Tia, Chloe, Courtney, Ian, Avery, and Ethan at the Eastern Bluffs at Devil's lake.
So if you are ever near Baraboo which is near Wisconsin Dells in Wisconsin, you need to go to the Devil's Lake State Park and do some hiking.  Be ready to climb though.

God bless and Thanks!
Don, Misty, and Kids.......
Twenty nine states visited so far.


Thursday, September 7, 2017

Master Bed Problems

As with anything you own, most everything breaks sooner or later.  So it was no surprise when our bed broke away from the wall in the master bedroom.
Bed pulling away from the wall in the RV.
So every time we would put the slide back out, I had to go and push the bed back in place, which was not easy to do, especially since we load it up with junk while moving.

It would also slide out of alignment when driving down the road due to the vibrations, which made it even harder to get back into position.

So I decided it would have to be fixed, which should not take too awful long.  Yea.

First thing you want to do is remove the lift support shocks that are used to life and hold up the bed base over the underneath storage.  There is one on each side of the bed.
Remove lift support shocks from underneath storage top.
The next step is to slide the mattress out of the way so that you can get to the top part of the bed and remove the ply-board.  It is a section about 3 foot by 5 foot.  There are 4 screws holding it in place that need removed.
Remove the 4 screws that hold the ply-board down at the head of the bed.
After you remove the 4 screws you also have to remove 26 screws that hold the piano hinge in place that allows you to lift the bed board to get to the underneath storage.
Remove screws that hold piano hinge in place.
Now you can remove the top plate and expose the underneath storage and where the bed frame attaches to the head board and wall.
Top plate removed to expose where bed frame attaches to wall.
Here you can see where the two screws (per side) pulled out of the bed frame.
See where the two screws pulled out of the bed frame.
I then pushed the bed back up against the wall by sitting at the bottom of the bed frame with my back against the dresser drawers and my feet against the bed frame.  I would push one corner a quarter of an inch or so and then slide over to the other end of the bed frame and push it about the same amount.

The headboard where the bed frame attaches to the wall is hinged, so once I got the bed frame close enough I pulled the headboard out from the wall and attached it to the bed frame with a screw on each side to hold it in place.
Pulled headboard into bed frame and attached with a screw to hold it in place.
I then started up the RV's engine and retracted the slide to let the slide motors push the bed back into place since my back was hurting from me pushing and it was almost impossible for me to have the strength of pushing the bed 100% back into place.

To ensure that this would never happen again I decided to use 5/16 inch bolts to reattach the bed frame to the headboard.  If they pull out, then there is something else wrong, like the bed frame getting hung or something.
5/16 inch bolts I used to reattach the bed frame to the headboard.
I was going to use 2 bolts on each side, but my other 1/4 inch bolts were too short, so I could not use them.  So I doubled the screws also and used 4 per side along with the 5/16 inch bolts.

The bracket seemed to be securely attached to the headboard into metal rather than wood, so I did not beef them up any.  I hope I do not pay for that in the future.
Bed frame attached with 5/16 in bolt and 4 screws.
After sweeping the area clean of metal shreds and saw dust, I reattached the top board and hinge. 
Reattaching top board to bed.
The hardest thing was getting the bed frame back up against the wall so that it could be reattached.  The entire job took me a good three hours to accomplish, but if I would have had help it would not have taken so long.  As usual though, a job that I though would be simple, turned out to be hard to do, but it is done.

So now when we slide, the bed goes in and out like it should without any human intervention.  Lets hope it stays that way.

God bless and safe travels!

Thanks!
Don, Misty, and Kids.......
Twenty Six states visited so far!


Friday, August 11, 2017

Zip Zip Hooray!

Zip a dee do dah, zip a dee ay, my old my what a beautiful day, when you go zip lining all the long day, zip a dee do dah, zip a dee ay.

Well I hope by now, that you have realized that this blog is about us going zip lining at the Metro Richmond Zoo in Virginia.  I did not zip line yet, myself, but plan to later on in the future.

A couple weeks ago Misty took Ethan, Courtney, Tia, and Ian to the Treetop Zoofari located at the Metro Richmond Zoo where they did the Treetop Zoofari course which has 44 challenges and 15 zip lines, which total over 3000 feet of zip lines.  It takes 2 to 3 hours to complete this course.
Ian, Tia, Misty, Courtney, and Ethan at the Treetop Zoofari zip line staging area.
Then yesterday Misty and I took Avery and Chloe to the Junior Explorer course which has 22 challenges and 2 zip lines and takes 60 to 90 minutes to complete.
Avery, Chloe, and Misty at the Treetop Zoofari zip line staging area.
Cami and I were there so we could lend moral support.  Misty and I plan on going back to do the Treetop Zoofari course next week sometime.
Dad and Cami giving them moral support at the Treetop Zoofari.
The adult course is $50.00 per person while the kids course is $25.00 per person.  Even though I feel that it costs too much for both, I guess the adult course is worth it since you do get to zip line 15 times and they are pretty high and scary.  

The kids course though is too short in my opinion and should have half the zip lines the adult course has, since it is half the price of the adult course.

All in all though, the kids had fun and I guess that is what really matters and that you can not put a price on that.

Below is a little video of everyone, except me, going down at least one zip line.
Here is the YouTube link for the above video in case it will not play here.

So that was a day of zip lining for most of the family.

I actually did not get to zip line later on due to my schedule and other reasons, but will soon one day.

God bless and may He keep your and yours safe!

Thanks!
Don, Misty, and Kids.......
Twenty five states visited so far.


Monday, April 24, 2017

Angels & Tires

God is good!

He watches over us in our travels and all other parts of our life.  We take Him for granted most of the time, but always ask for His forgiveness and thank Him for giving us his Son, Jesus to save us.

While traveling back to Virginia from Arkansas some thousand plus miles, I knew that all of our Goodyear tires that came on the RV originally were starting to wear to the point that they needed to be replaced.

The Goodyear G670 RV 275/70R 22.5 tires are known for rivering, especially on the inside and ours were no exception.  We had 28000 miles on them and they were to the point of exposing the inner layers of the tire.  I'm sure the steel belts were not far from showing.
Passenger front Goodyear G670 tire that is rivering on the inside tread.
The front driver's side tire was the worse of all of them and so if any were going to have a blow out, then it had the best chance.  If you look real good you will see where it had worn through the top layers of the tire and was starting to expose an inner layers.
Driver front Goodyear G670 tire that is rivering on the inside tread.  Notice it is into the inner layer.
I knew the tires were starting to wear excessively and would need to be replaced soon, but just kept putting it in the back of my mind that I would get them changed later on.

Sometime thinking about the logistics of getting the RV worked on can be overwhelming.  Since it is our home, when we are displaced out of it, we are out of our home.  Then we need to find someplace to go kill the time it will take to do whatever work is being done on the RV.  If I have a conference call to get on or work to do, then that even complicates it even more.  So it is easy to put off maintenance until it becomes necessary.

Misty follows me in our Nissan van due to it not being rigged for towing yet and so is almost always behind me during the drive.  We usually talk most of the time on the phone to keep each other company and keep us from falling asleep.

While driving from Little Rock, AR to Memphis, TN I could feel the tires on the pavement and knew that every rotation was wearing off more and more tire.  I would tell myself that if I would have a blowout to accelerate to keep the RV moving forward until I had control and then slow down and pull over.

At this point I said a prayer that the Lord keeps us safe, that we do not have a blowout, and that He helps me to get my act together and get new tires.  So on down the road we went without any issues.

Well a little while later, once we are in Tennessee, Misty tells me on the phone that she saw an Angel following along the RV at my driver's window.  She said it looked like a shimmering light, but was not a reflection off the RV or anything like that, and she had a very peaceful feeling while watching it.  She said it followed along with the RV for miles and miles and afterwards she would catch a glimpse of it once and a while.

Later one that night we stopped in Knoxville, TN and spent the night at a Love's truck stop.

The next morning Misty was adamant that we check the tires, especially the inside tread and when we did I knew we had to get tires before we finished the last four hundred plus miles to get to Virginia.

So after calling around to a bunch of tire shops in the area we ended up getting refereed to David's Tires in Knoxville, TN who had tires in stock for our RV, were the cheapest so far, and could get us in the next day.  They would also let us stay in their parking lot overnight so that we would be there first thing in the morning.
David's Tire Service in Knoxville, TN
We ended up buying the Firestone model FS561 tires from David's Tires, which seem to drive much better than the Goodyears that were originally on the RV.  

For six tires, balancing, and a front end alignment our cost was $3454.49 out the door.  For Goodyear tires we were quoted $4800.00 for the same thing and had to wait for them to order the tires.
Firestone FS 561 275/70R 22.5
Firestone FS 561 tread.
David's Tire was also going to install a Safe-T-Plus steering stabilizer on the front of the RV too, which really helps tighten up the front end especially in winds and helps in case you ever do have a blow out by not letting the steering wheel be jerked out of your hands.

For our RV we required the blue Safe-T-Plus model 41-230 with the F-143K2 hardware kit for installation.  For some reason when the mechanic was installing it, he called me and said that the U bolts in the kit were too small and he could not install it after all.

So I took his word for it and did not question him.  Once we were at our next location to park I emailed the Safe-T-Plus company and told them they gave me the wrong kit. They wanted me to go measure my tie-rod so they could send me the correct U bolts.

While doing that I took the entire hardware kit under the RV with me to see if in deed the U bolts were too small and found out that they were not.  I had to tap them on with a hammer, but they fit good and snug with plenty of treads left for the nuts after the mounting plate was attached.

I called David's Tires and told them they were mistaken and then crawled under the RV myself and installed the Safe-T-Plus.

While installing it my air gun died on me after removing the 3/4 inch bolts holding on the shocks, so I had to tighten them along with the same size bolts to hold on the stabilizer by hand using a 1 1/8 wrench and a crescent wrench.  

Needless to say, my arms and shoulders were sore from laying on my back, reaching up for hours, tightening the 3/4 inch 3 inch long bolts with lock nuts.  I could only get a 1/4 turn of the nut each time, so it took a long time to finally get them snugged up and tightened.

The whole process of installing the unit should have only taken an hour, but it took me a good four hours, but it is done.

I waited a couple of days until we had to go up towards Alexandria, VA on business to test drive and adjust the steering control.  Once I reached I-85 where the road was good and level I noticed that it did pull just a little to the right, so marked the steering wheel where it tracked straight.

After stopping to get fuel I parked in a safe location, grabbed my tools, and crawled under the RV and made the adjustments by loosing the U bolts and letting the tie-rod mount slide into position while one of the kids held the steering wheel in the position that I marked.  Then I tightened the nuts back up and went on our way.

Now my front end is not as loose as it was and I do not have to fight the steering wheel as much.  I'm glad I installed it and it is nice to know that if I would have a front tire blowout, the steering wheel should not be jerked out of my hand.
Model 41-230 Safe-T-Plus installed on a Fleetwood Discovery RV.
Make sure you read the installation instructions for your hardware and RV model when installing your Safe-T-Plus since my installation was completely backwards from the installation video off of the Safe-T-Plus web site.

Also during this event I lost my cool a couple of times since it seemed nothing was working out and taking much longer than planned.  Misty realized that she did not say a prayer for me yet that day and so prayed that the Lord help me to install the Safe-T-Plus and keep me safe while doing it.

I clearly remember after smashing a knuckle and taking a little temper tantrum that all of a sudden a calmness came over me and I was able to finish the job without any more issues.  I am sure that is when Misty said her prayer for me.

So God was surly watching over me while installing the Safe-T-Plus and while driving on our old tires.  

I'm sure some will not believe Misty saw an angel and that it is all just a coincidence, but we know God is good and is always watching over us and will assist if it is really needed.

All you need is a prayer and believe in the Lord.

We are so blessed and at times I feel ashamed at how sometimes we forget that or think that life is hard, when we have it all, just knowing the Lord and that he died for our sins and saved us.  God has blessed me and my family and we have never done without, so to ask for more is just being greedy.

God bless and safe travels!

Thanks!
Don, Misty, and Kids.........
Twenty Six States Visited So Far.


Wednesday, March 29, 2017

Getting Fed Up

As of the 26th of April, 2017 we will have been fulltime RVing for 5 years, which has really flew by.  The kids have grown, we have added to the family, and for the most part have loved our mobile lifestyle.

We have met so many good people in our travels and seen some really great places along the way, but one thing that sort of bums us out is finding RV parks that hassle us about having 9 people in our party with 7 of them being kids.

Nothing is worse than when they ask how many kids you have and I say 7.  That is usually when they ask if I'm kidding and when I say I'm not, their looks change and many times they say that we can not stay in their park or we have to pay an extra $10, $20, or $30 extra a night.  That starts to add up in a very short time.

There has been many times when we have left a park because they wanted too much since we were over the 2 or 4 person limit.  I do not remember how many times on the phone the manager or person on the line will tell me that they do not wish for us to stay at their park, especially in Florida upon learning how big a family we are.

I understand that the extra people can use a little more water and sewer, but I do not feel they are that much more of a cost on the RV park, especially if you are paying a monthly fee with metered electric costing extra.

I'm sure there are plenty of RV park owners who would argue me on this and say that it does cost more.  Like I said, I could see us using more water which usually makes your sewer cost a little more, but the electric is pretty much what it is regardless of the number of people in the coach.  I guess maybe another laptop or TV may use a little more electricity, but how much more?

Our 2011 Fleetwood Discovery 40G which has 3 air conditioners uses on average $150.00 a month for electricity when being charged $0.11 a kilowatt.  It may be a little cheaper if it were just Misty and me, but I doubt it.  The air would be set at the same temperature, we would use the electric oven the same, and in the winter the heat pump would run the same amount of time.

Am I wrong?  Is my view one sided or what am I missing?  Do any of you RV park owners have data to disprove me?  I understand you have to make money, but lets be fair.  I can also understand maybe charging a few dollars more a night if we are paying by the day since electricity is included in that price, but not for a monthly rate when the electric is metered. 

But paying extra is not really the issue and in may cases I do not mind paying an extra $100.00 a month for the extra people, especially in a nicer RV park with lots of amenities. 

What I have an issue with is that many RV parks do not want that many kids or say their policy is only 6 or 8 people per site.  Like we are a bother or are like a plague.  I know that if the kids are not well behaved, then it could be a problem, but we are very strict with our kids and they are very well behaved.  

That is not just their father saying this either, too many times we are told by others how well behaved and respectful our kids are, so we know it is true.  Many times we have had individuals apologize for what they thought of us when first seeing all the kids for the first time.

The Bible say, "Behold, children are a heritage from the Lord, the fruit of the womb a reward. Like arrows in the hand of a warrior are the children of one's youth. Blessed is the man who fills his quiver with them! He shall not be put to shame when he speaks with his enemies in the gate." Psalm 127:3-5 ESV

It is bad enough that when you rent a hotel room they have a limit stating it is a fire hazard to have more than 4 or 5 per room, but who has the right to tell me how many people I can have in my RV that I paid my hard earned money for and own?  This is why we bought a 40 footer diesel pusher to accommodate us all.

I know there are camping clubs like Coast to Coast and Thousand Trails that may help with your cost and allowing you to have a big family, but I have even heard rumors that some of the parks who belong to these camping clubs complain when a big family rolls in.  If this is not true then please comment and let me know.

We also stay at military RV parks whenever possible because they usually do not care or ask how many kids you have and are a little cheaper than civilian RV parks, but while staying at Fort Stuart in Georgia they charged me extra for the kids.  I was able to negotiate a litter cheaper price for the kids, but did not like it that we were charged extra.  They did not even have full hookups in the park so we had to use a dump station for the black and gray tanks, but the cost was the same as a park that had full hook up.

It is getting to the point that I do not want to say how many kids we have and keep them in the RV at all times so the neighbors do not see all of them.  We have to sneak out after dark so as not to raise suspicion and so that our numbers can not be counted. It is like living in a submarine while being plummeted with death charges, us not making a sound so that they can not hear us and get a lock on our location or numbers.

When walking the dog I'll make them wear the same set of clothes so that anyone watching will think it is the same two kids every time.  We make them wear a hat so that the girls look like the boys.  If the blinds for the front window are up, only two kids at a time can stand near them or look out so that they can not be counted and once again they need to rotate their clothes and headgear so it always looks like the same two kids.

Sometimes if there is a really nosy person in the park keeping an eye out for us, I will have two of the kids go to the van and then have them change their clothes and bring the clothes they wore back into the RV for two other kids to put on and then have them walk to the van and so on.

Well it's not really all that bad and I may be exaggerating some, but at times it feels that way.  There are lots of RV parks that do not care how many kids we have and we pay the normal monthly rate which sometimes even includes electricity.  We always revisit those parks when traveling back through their areas.

Now I do not want any of you RV park owners to take this personal and I do not hold any grudges.  I have met so many great park owners of who some have charged us extra for the kids and that is fine.  I know you have your reasons and think you are only doing what you have to do to make a living.  It is just frustrating when trying to get a spot at a new RV park where we have not stayed at yet and do not know anyone and they do not know us.

So far we have visited 25 states and pretty much know where to stay in all of them, but with the other 24, we have apprehension when it comes to finding new parks to stay at.

Being members of Fulltime Families is a blessing since they have a really good listing of family and kid friendly RV parks that helps some, but it is limited and does not cover every place in America.

So that is my rant for this blog and just one of the minor problems for us living a fulltime RVing life.

We are looking for some land, preferably in Texas, to have a home base where we can winter and stay for free, but we will always be on the road most of the year seeing all there is to see in America and visiting friends we have met and will meet while living our mobile lifestyle.

So if anyone knows of any land in Texas that's at least an acre in size, then please let us know about it.  We would love it to be near Coppell, Denton, or Frisco, Texas, but will consider any we are told about.  Something that already has utilities and no RV restrictions would be great.

Oh, and for those in the family who had a bet on how long we would last as a fulltime RV family, I think the longest time given was 5 years by one of our aunts, which we will be past in a month, so I'm not sure if anyone will win the bet.

We are so blessed to be able to live this way and thank God for all He has done for us.

God Bless and safe travels!

Thanks!
Don, Misty, and Kids.......
Twenty Five States Visited So Far.


Wednesday, February 1, 2017

Winterized

An easy way to winterize your RV is to keep it out of any freezing temperatures, so that is just what we are trying to do this winter.  Well sort of.  We decided to head down to Tampa, FL to spend some of the winter and also visit family and friends that live in the area.

Our son Jered and cousins Mike and Nancy both live just south of Tampa and so it seemed like a good place to say to visit all of them.  One of my work counterparts also lives south of Tampa, but unfortunately, we did not get a chance to visit with each other, but there is always next time.

We ended up staying on MacDill AFB in the FAMCAMP which is a very nice RV park.  They have a 14 day limit during the snowbird season, but we were lucky to get an extension of 14 days, so ended up being able to camp there for 28 days before we had to pull out.

They will let you stay in dry camp until a full hook up lot comes open again, but we decided that we would head north since I have to be in DC later on in the month for some business.  We are not really looking forward to being that far north during the coldest times of the year, but will just pray that no storms come in during that week in DC.

Hopefully after I get done in DC we can had south again for the rest of the winter.
Sunset in Tampa.
The beach on MacDill AFB.
Avery, Ian, Courtney, Chloe, and Tia on the beach at MacDill AFB.

Watching a cruise ship sail out from port.
The sun setting over Saint Petersburg, FL.

While in Tampa we went to go see the manatees at the Manatee Viewing Center.  It was just across the bay from MacDill AFB, but since you have to drive around the bay to get to there, it was a good forty minutes away.

Unfortunately we could only see the backs of the manatees but did see some rays jumping out of the water.

Manatees' backs.
A ray jumping out of the water.
Tarpon swimming by.  The one in the middle is a good five feet long.
We had a great time visiting with all our family while in Tampa with them coming to us on base and us going to their homes.  It was a shame that we had to leave so soon and could not visit a lot more.
All of the family posing with Jered and Hannah for our Christmas picture.

Jered and Hannah with the sun in their eyes.
The kids with cousins Mike and Nancy.
Jered an I also got some fishing in while in Tampa.

A little catfish we caught while fishing one night.
We are not sure where we will end up after the week in DC, but it will surly be a southern state where it will be much warmer than in the north.  We do not mind the cold but it is so much easier if it does not get below freezing or only does it once in a while.

On the last visit with Jered we went to Manasota Beach to look for shark teeth. 
On the beach looking for shark teeth.

Tia, Chloe, and Jered looking for shark teeth.

Everyone looking at what Jered found.

Jered's first shark tooth of the day.

Courtney's find for the day.

Ethan's find.  He only looked for a few minutes though.

All the shark teeth Jered found.
Jered and his shark teeth.
We also took a day trip to visit Misty's family, Steve and Mary Winters Smith north of us while in Tampa.  We had a really good time visiting with them.  We would have loved to have had more time to visit, but a short visit is better than none.
Mary Winters & Steve's family with Misty and our family.
Mary Winters & Steve's family with Don and our family.

So all in all we had a great time while staying in Tampa and visiting all the family.  It was great to see Jered, Hannah, and all her family along with Mike, Nancy and all of their family, and then Steve and Mary with their family.

Also while there my sister Brenda, my nephew Devin, and their friend happened to come to FL for a short vacation and came over for dinner one night.  It was really great to see them while we were there.

We are so blessed to be able to live this lifestyle and have the option to visit family all across America.  God has been and is good to us.

If you follow us on Facebook you can see where we are and so probably try to link up with you while in your area.

God bless!

Thanks!
Don, Misty, and Kids...
Twenty five states visited so far.